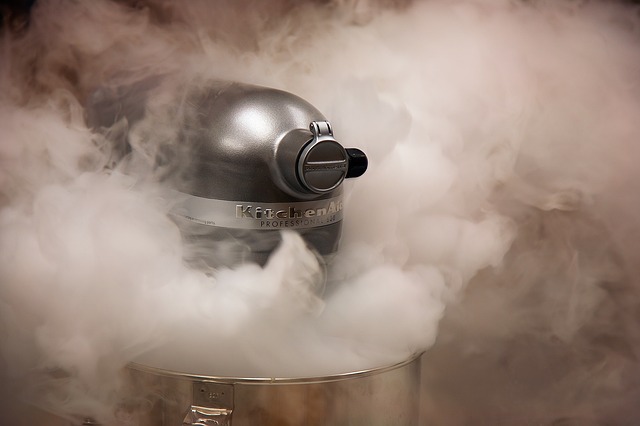
A KitchenAid mixer is a convenient, and increasingly important tool to have in your kitchen.
The mixer allows you to perform a variety of functions, including food processing functions, meat grinding, mill grilling, pasta making, kneading bread with a KitchenAid mixer, and other diverse functions.
In fact, there are so many uses of a KitchenAid mixer. For instance, a KitchenAid mixer would be an ideal gift for a wedding or a baby shower.
In the house, you can use it for mundane but seemingly difficult tasks which may be difficult to perform using bare hands.
A minimum of 8-10 minutes at (Speed 2) is required to knead Dough in the KitchenAid Mixer. You can repeat the process for 3-4 minutes for the best results.
For example, chopping and spiraling vegetables may be a difficult task when performed using bare hands and to kneading dough in a KitchenAid mixer.
There is the risk of cutting yourself with a knife when chopping.
During such an instance, using a KitchenAid mixer will save you considerable time and stress, allowing you to focus on other tasks.
Here are Great tips on How To Knead With A Stand Mixer
Ways to tell when your dough is kneaded
Can I knead dough in my KitchenAid mixer? Kneading dough, more so using a kitchen mixer, may require artistic skills. Kneading is one of the most mysterious aspects of bread making.
The whole point of kneading dough with KitchenAid mixer is to make sure to strengthen the gluten in the bread, which are the bands of protein that give the bread its structure, appearance as well as texture.
First of all, for standard practice, whenever you are kneading dough in a KitchenAid mixer, always ensure that your dough is needed for a minimum of 8-10 minutes.
If your mixer has been massaging your dough for that duration of time, you can be sure that the job is well done.
Moreover, there are other aspects to consider when kneading your dough to ensure smoothness and the best texture when using a mixture as you perfect on how to knead dough in the Kitchenaid mixer.
If you want a smooth mixture, your dough should be completely smooth and tacky.
Read on How to tell if Bread is done

Initially, your dough may look lumpy, shaggy, or very sticky, more so if you have used the excess liquid.
However, with continuous and consistent KitchenAid mixer speed for kneading, the dough will gradually smoothen and the lumps will even out into a consistent and tacky dough.
When this happens, you should lift the dough with your hand, holding it in the air for some time.
Doing this is extremely important as it would ensure the gluten in the dough remains strong and tight.
This is the perfect dough. On the other hand, if the dough still sags between your fingers, is loose, slippery, and still feels slimy, it means that more kneading work still has to be done.
How long to knead bread dough in KitchenAid mixer? In this case, you can place your dough back into the bowl and knead it using the KitchenAid mixer for 3-4 more minutes.

To further ascertain whether your dough is ready, you should consider doing ‘the poke test.’
This is simply a method whereby you give your dough a firm fast poke with your finger, and it is done to ascertain whether the dough is ready or not.
When you do this and the indentation rises back up quickly, it means the dough is ready and you are definitely good to go.
However, if it stays without rising back up (assuming the form of a dimple), then you need to continue kneading.
In this case, you can place the dough back into the bowl and knead it using the KitchenAid mixer to get it into the right texture.
You can do this intermittently while checking the texture and smoothness of the dough each time.
Still Wondering which is the best technique between using a Dough Hook and Hand Kneading?
Read here on The truth about Dough Hook vs Hand Kneading: Which is best?
Windowpane test.
Alternatively, you can consider doing what is popularly termed as ‘windowpane test’.
This is a method of ascertaining the strength of the dough, whereby you would have to place the piece of the dough into a ball, preferably a ball the size of a golf or tennis ball.

Thereafter, stretch this golf ball into a thin sheet, which should be thin enough to fit in between your closely held fingers.
For the best results, if your dough is well prepared, it would stretch into a thin paper film between your fingers, without breaking or flaking.
However, if your dough keeps breaking, then you would have to keep kneading.
Just remember that as you put the dough back into the bowl and knead it using the KitchenAid mixer, be gentle and knead it, letting it rest for some time, stopping intermittently to check if the dough is perfect.

Fun Fact: Did you know you can use the stand mixer for more tasks other than kneading dough?
Find 15 Creative Stand Mixer Uses You Need To Know About Today!
Using a KitchenAid mixer can be tiring after all, especially if you have been using it for more than 12 minutes without stopping.
Harsh as it may sound, this is one of the best methods of finding out whether your kneaded dough is well done.
Ideally, when you get tired of kneading, it simply means you have been doing so for a considerable amount of time and is therefore tired.
This could be probably for more than ten minutes and is an assurance that your dough is probably good.
However, please use the KitchenAid intermittently as it also ensures a longer shelf life for the mixer.
Please note that using a KitchenAid mixer to knead your dough is equivalent to 8-10 minutes of kneading by hand.
When you knead for more than 10 minutes using the mixer, you will notice the dough rising onto the dough hook.
This should not happen. Actually, the dough should form a ball, and detach from the sides of the bowl.
For best results, always refer to the use and care guide provided when purchasing your KitchenAid mixer.
It is important to note that most KitchenAid mixers do not recommend kneading for too long, especially when using speed 2.
Some guides also recommend using only speed 2, but not higher or lower. That will determine how long to knead dough in a KitchenAid mixer.
You need to store your bread correctly. Find 3 Simple Steps on How to Store Banana Bread Here
Kneading using a KitchenAid mixer

Can a KitchenAid mixer knead bread dough? When using the KitchenAid mixer to knead the dough, you will probably notice the head of the mixer moving up and down during the mixing process.
Especially when dealing with thick dough, you may also notice your mixer head moving, especially when you are using a tilted head mixer.
Please note that this is quite normal, however, you should still take note of your KitchenAid mixer.
For instance, if the head of your mixer is moving or even bouncing frequently, you should check some adjustments to ensure that the beater is not tilted too high or too low.
The knead speed on KitchenAid mixer could cause the head of the KitchenAid mixer to bounce.

Keep a small distance in either case, to ensure the contents of the dough do not spill on your face, or the KitchenAid mixer does not hurt you in the process.
Before using your KitchenAid mixer to knead the dough, also ensure that the silver pin which holds the head of the KitchenAid mixer is tightly fixed, and if possible you can reinsert it to ensure a firm grip on the same.
When the silver pin is loosely held, it is not only dangerous for you (as the handler of the KitchenAid mixer), it will also mean that your dough will not be kneaded properly.
You should probably check on this before you start kneading the dough, for the best results.
If you find that your silver pin is too loose and you do not know how to fix it, you can ask for help from a professional.
There are also a variety of online videos and tutorials which can guide you on how to make the best adjustments and how to knead dough with KitchenAid mixer.
It is also important to get the best type of KitchenAid mixer from a reputable store.
Also, see a review on the; Best Stand Mixer Under $100.

The Process of Using KitchenAid Mixer.
Below are some guidelines on how to knead bread with KitchenAid mixer.
- It is advisable to start by putting all the dry ingredients into the bowl, before the wet ingredients. For instance, when mixing dough for a cake, put all the dry ingredients into a bowl (flour, yeast, sugar, salt) and then turn the mixer on.
- Thereafter, incorporate the wet ingredients (egg, milk, water) and other ingredients.
- Turn on the KitchenAid mixer again for a few minutes, taking care to scrape all the ingredients away from the edges of the bowl.
- Take turns doing this, and use at most two minutes on speed 2.
- If you find your dough to be too wet, you can consider adding more of the dry ingredients (like the all-purpose flour), while kneading using the KitchenAid mixer.
Alternatively, you can also put all the liquid ingredients into the bowl and knead using the KitchenAid mixer, before adding the dry ingredients.
Plenty of online reviews suggest that this is an effective method, especially if you are making bread.
Flour Requirements and Capacities
As you use the KitchenAid mixer, it is important to use the right size and capacity depending on the size of your bowl.
Therefore, ensure that you read your guide to find out the best mixers for different flour capacities. Using a KitchenAid mixer knead dough to your desired consistency.
As most baking and kneading activities entail using all-purpose wheat flour, you can start by evaluating the different varieties of wheat flour in the market.