When I first thought of canning to preserve my food, I felt so intimidated. It felt like a complex process that needed a lot of time and energy but I am always up for a challenge.
So I started doing my research on canning food preservation ideas.
Water Bath Canning Hacks. Click here to read.
History of canning.
Canning is a method of food preservation. It prevents food from getting spoiled. The food is stored in hermetically sealed containers and then sterilized by heat.
The canning process was invented in 1809 by Nicolas Appert. He invented it after prolonged research. France had for a long time been looking for a means to preserve food for army and navy use.
His method of preservation involved tightly sealing food in a bottle or jar, heating the jar to a certain temperature and maintaining the temperature for a while, and finally keeping the jar tightly sealed until years.
It was not until 50 years later that Louis Pasteur was able to explain why canned food did not spoil. Exposing the food to heat-killed all the microorganisms in the food and sealing prevented any other microorganisms from entering the food.
In 1810, Peter Durand patented the use of tin-coated iron cans in food canning. He used the cans in place of jars. By 1820, he was already supplying large quantities of food to the royal navy of England.

Soon thereafter, European canning methods reached the United States. The United States eventually became the world leader in automated canning processes and total can production.
Samuel C. Prescott and William Underwood of the United States described specific time-temperature heating requirements for sterilizing canned foods in the late 19th Century.
Initially, cans were made from a sheet of tin-plated iron rolled into a cylinder. The cylinder was the body of the can. The top and bottom were manually soldered. In the early 20th Century, this method was replaced by a modern can whose parts are joined by interlocking folds that are pressed together.
After that, the polymer sealing compound is applied to the end seams. Body seams are sealed on the outside by soldering.
The modern tin can is manufactured automatically at rates of a hundred cans per minute. It is made of 98.5 percent sheet steel with only a thin coating of tin which is mostly known as the tinplate.
Also, Click to check out: 10 Canning mistakes you may be making and don’t even know.

Processed foods, dairy products, fruits, vegetables, and meat are mostly stored in tin cans whereas soft drinks and other beverages are stored in aluminum cans.
Aluminum cans are way lighter than tin cans and they also don’t rust which makes them the perfect choice for soft drinks and beverages.
Normally, canneries are located close to the growing areas of the products that are to be packed. This is because foods ought to be canned as quickly as possible after harvesting.
The canning process consists of several stages. However, filling cans is done automatically by machines.
Most people eventually adopted the canning method and started canning food in their own homes. It is a process that requires lots of time and patience but the end results are always worth it.
The canning method of food preservation is greatly recommended for various reasons. For instance, it preserves most of the nutrients in food. Fats, carbohydrates, proteins, and vitamins are always unaffected.
However, the retention of vitamin B1 depends on the amount of heat used during the canning process. Some vitamins may dissolve into syrup but still maintain their nutritive value if the syrup is consumed.
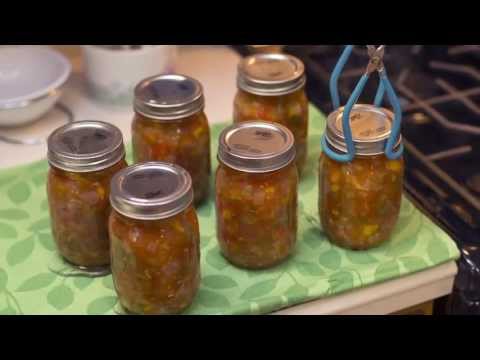
How to can diced tomatoes

Canning diced tomatoes is a great way to quickly preserve ripe tomatoes. They really come in handy since you can use them in soups, stews, and chilies. Normally, I try to preserve as many tomatoes as I can.
Once tomatoes are ripe, there is only a small window available for you to preserve the tomatoes before they get spoiled.
Since I can tomatoes a lot for convenience, I came up with a recipe for canning diced tomatoes. So far, I have never been disappointed.
Here is how to can diced tomatoes.
Materials needed
- Boiling-water canner
- Canning rack
- Jars, lids, and bands
- Jar-lifter
- Headspace-measuring tool
- Clean kitchen towels
- Labels
- Timer
Ingredients:
- Citric acid
- Lemon juice
- 15 pounds of tomatoes
Instructions:

Preparing the canning equipment
- Wash your jars and lids in soapy water and rinse them well.
- Place your jar rack into a water bath canner and set the clean jars in the canner.
- Add water the canner and boil the jars for 10 minutes for them to sterilize.
- In a small pot over low heat, warm your lids for 5 minutes.
- Keep the lids and jars warm until they are ready for use.
Preparing the tomatoes.
- Wash your ripe tomatoes in water.
- In a large saucepan, boil water over medium heat. Dip your tomatoes into boiling water and let them boil for 30-60 seconds until the skins crack and loosen.
- Remove the tomatoes from the boiling water and place them in a bowl of ice water. Once they are cool, discard the water.
- Peel the tomatoes and trim off any areas that are discolored or bruised
- Dice your tomatoes into quarters.
- Place your lemon juice and tomatoes in a large pot and bring it to boil over medium-high heat. Let the tomatoes cook for 5 minutes
- Reduce the heat to low and keep the tomatoes warm until they are ready to use
Canning the diced tomatoes

- Spread a kitchen towel on your kitchen counter.
- Remove your warm jars from the canner using a jar lifter and drain them.
- Line up the jars on the kitchen towel and add ¼ spoon of citric acid or bottled lemon juice to each jar.
- Fill the warm jars with hot tomatoes using your canning funnel. Leave ½ inch headspace in each jar.
- Stir through the jars using your bubble popper to release air bubbles and wipe the rims.
- Use your magnetic lid lifter to lift lids out of the warm water. Center the lid on the jar and screw it on until it is tight.
- Use a jar lifter to place the jars into the canner and adjust the water level so it is at least one inch above the jar top.
- Bring the water to boil over high heat. Once it boils, process the pints for 35 minutes.
- Once processing time is over, turn off the heat and allow the canner to cool down. Let it settle for about 10 minutes.
- Remove the jars from the canner and let them cool for 24 hours.
- Label and date the jars and store them in a cool dark place and use them within 12 months.
How to Preserve Fresh Tomatoes without Freezing. Click here to read.
How to can diced jalapeno peppers

It was quite hard to get a recipe for canning jalapenos that are not pickled. Eventually, I chose to can them using the same method I use to can other basic veggies.
To make my work easier, I prefer preparing my canner, jars, seals, and rings prior to prepping my peppers.
Here is how to can diced jalapeno peppers.
Ingredients:
- 6 pint canning jars with lids
- Fresh jalapenos peppers
- 8 cups of water
- 4 cups of vinegar
- ½ cup of canning salt
Instructions:
- Wash the canning jars and lids in soapy water. You can also wash them in the dishwasher.
- Place the jars in a water bath canner and let them boil for 10 minutes for them to sterilize.
- Wear rubber gloves and clean the jalapenos by trimming the stem end and cleaning out the seeds from the inside.
- Using a small paring knife, cut into the jalapeno and around the ribs so that the insides can be pulled out.
- Tap the open end of the jalapeno on your kitchen surface to remove the remaining seeds. You can leave a few seeds in the jalapeno if you want hotter jalapenos.
- After removing the seeds, slice the jalapenos into rings.
- In a saucepan, boil some water. Pour the jalapenos into boiling water and boil them for 5 minutes. Remove from heat.
- Fill your canning jars with jalapenos but make sure to leave one-inch headspace.
- Add one teaspoon of canning salt to each jar.
- Mix brine solution in a saucepan and bring it to a full boil.
- As the brine is cooking, place your lids in a small pot and warm them for five minutes. Keep them warm until you are ready to use them.
- Pour the boiling brine over the jalapenos in the jar until the jalapenos are completely covered. Leave ¼ inch headspace
- Immediately place the warm lids on the jar and seal firmly but not too tightly.
- Allow the jars to cool at room temperature for 24 hours.
- Store in a cool, dry dark place and use them within 12 months.
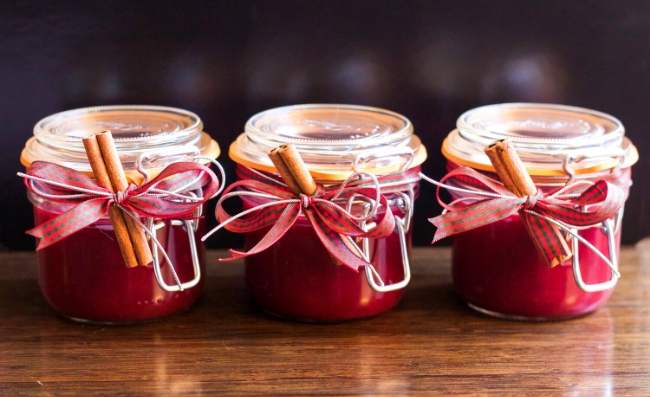
How to can jam.

The canning technique can intimidate even the most experienced cook. However, it is not really that hard. Preserving can be hot sticky work but the end results are always glorious.
Everyone in my family loves jam, and so do I so I had no other option other than mastering the technique of canning jam. I use a simple recipe that is very easy to follow.
Here is how to can jam using basic canning techniques. We will use a plum jam recipe. The same method can also be used to preserve other fruits and vegetables.
Materials needed:
- Boiling-water canner
- Canning rack
- Jars, lids, and bands
- Jar-lifting tongs
- Headspace-measuring tool
- Clean kitchen towels
- Labels
- Timer
Plum jam ingredients:
- 3 pounds plums diced
- 3 cups of organic sugar
- 1 tablespoon of fresh lemon juice
- 3⁄4 teaspoon of salt
Instructions:
Preparing the canning equipment
- Wash the jars in soapy water and rinse well. Set them aside.
- Place the jars in a large pot of water and bring it to simmer
- Place the lids in a separate small pot with water and let it simmer as well. Leave the jars and lids in the water until you are ready to use them.
Preparing the plum jam
- In a stockpot over high heat, combine the plums, sugar, lemon juice, and salt.
- Bring the ingredients to boil and then mash them using a potato masher.
- Skim and stir frequently for 10-12 minutes until the bubbles slow and you can see chunks of fruit at the top. The mixture should cling to a spoon and fall off in languid clumps.
- Discard the skins at the top with a fork.
Canning the plum jam
- Using the jar lifting tongs, lift the jars out of warm water and drain them.
- Pour hot jam into the jars using a funnel and leave at least ½ inch headspace in each jar.
- Use a wooden spatula to stir the jam in order to release any air bubbles present.
- Wipe the rims with a damp cloth.
- Remove your lids from hot water and place them on the jars.
- Firmly and evenly screw the bands down until you meet some resistance
- Place your closed jars in a canner filled with water and close it with a canner lid. Bring the water to a boil.
- Process ½ pints in 10 minutes at a gentle but steady boil. Set your timer for this.
- Turn the hit off and remove the lid of your can. Let the canner cool for approximately 10 minutes then use the jar lifting tongs to remove the jars from the canner.
- On your kitchen towel on the countertop, set your jars upright. Do not retighten the bands.
- Let the jars cool for 24 hours then check the lids for a good vacuum seal.
- Label and store your jams in a dry dark place and use it within 12 months.
Safety tips
- Always check your supplies and ensure they are in good condition.
- Ensure your jars are free of chips and scratches as this may interfere with processing and sealing
- Never re-use the lids. The jars and bands can be recycled.
- Always cool your jam as required.
- Do not place hot jars directly on the kitchen counter as this may make the glass to break. Instead, place them on a kitchen towel on top of the counter. You can also use a cooling rack
Must have canning supplies.

Eating food that you preserved yourself is so rewarding. It is healthy and as delicious as it would have been when it was still fresh.
You also have absolute control over the ingredients which means you get to enjoy whatever you have preserved exactly the way you like it.
Canning can be a bit time consuming but you probably don’t need as much equipment as you have always imagined.
It is something you can totally do. You will be surprised that you already have most of the needed equipment in your kitchen right now.
Here is a list of the canning supplies I use, how I use them, and why I use them.
- Canning jars, lids, and rims
Canning jars are most commonly known as mason jars. They are created specifically for canning. They come in different sizes. The size you use will greatly depend on what you want to can.
Canning jars have two types of openings at the top. Some have a wide mouth and others have a regular mouth. Usually, it is easier to transfer food from a jar with an open mouth.
Canning lids are normally in two pieces; the lid and the rim. You should not keep rims in your jars after they are sealed because they are prone to rust.
You can reuse jars and rims but you should never reuse the lids.

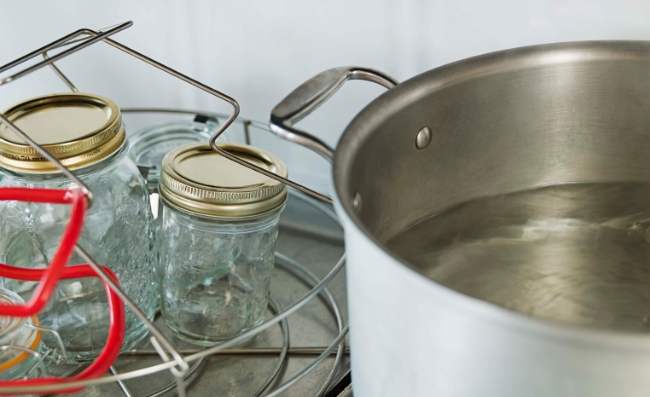
- Water bath canner
A water bath canner can always be substituted with a large pot with a lid and a rack. I use a water bath canner since it is specifically made for canning and can pint jars. It came with a rack that fits 7 jars.
If you are unable to buy a water bath canner just use a large stockpot for small batch canning. However, this will limit you to canning only four jars at a time.
Always have a rack at the bottom of your pot to prevent them from cracking open.
- Jar lifter
A jar lifter always makes the process easier and safer. It is also quite affordable.
Normally, a jar lifter has a rounded end that is coated in rubber that will grab a mason jar securely when it’s in the hot water. It will also prevent the jar from slipping.
You can use tongs in place of the jar lifter but I highly recommend using the jar lifter itself.
- Large stockpot
You probably already have this in your kitchen. Get one that has a large surface area for recipes that require the liquid to evaporate.
I also prefer one that has an enamel cast since it heats more evenly than other pieces of metal.
It is also quite easy to clean.
- A chopstick or stir stick
You will need these to get rid of air bubbles in whatever you want to can before sealing the jars. I use a stir stick that I bought for a really low price.
- Kitchen timer.
Everyone has one of these, right? Always remember to set it when you are supposed to. I usually have a hard time remembering when to set my timer but I am working on it.
- Wooden spoons
These will be used for mixing jelly and jam and also stirring salsa.
- Mixing bowls
Mixing bowls come in various shapes and sizes. You will use them for mixing ingredients and holding fruit.
- Sharp knives
I always use a paring knife when preparing food for canning. Other times I use a chef’s knife more specifically when I need to chop.
Paring knives are great for cutting and peeling off the skin.
- Tongs
These are typically for reaching things that are in hot places without getting burned. I use them to pick up lids in hot water and also to adjust large pieces of fruit.
- Slotted spoon
A slotted spoon always comes in handy when canning tomatoes and you need the liquid to drain off. You can also use it when canning large pieces of fruit.
- Clean kitchen towels
Canning can be quite messy so you will need kitchen towels to clean your messes, wipe your hands and even place hot jars on them so that the jars do not mess up your kitchen counter.
- Strainer
You will use it to strain seeds out of your mixture.
- Ladle
You will use a ladle to transfer food into your mason jars.

- Canning funnel
A canning funnel is not mandatory but using it means you will not make a mess in your kitchen. I always keep one handy.
- Pectin
Pectin helps fruit achieve the thick consistency needed for jellies and jams. It is available in liquid and powder form. However, you will not use pectin on all your recipes. Some fruits have enough pectin in them to make jelly.
- Lemon juice
All canned foods always require a certain acidity level. This helps them remain safely preserved. Bottled lemon juice is perfect for this since its acidity is regulated. The acidity in fresh lemon juice is unpredictable thus not safe to use.
- Vinegar
This is yet another ingredient that will help you achieve the right acidity level.
- Sugar
Sugar is a common sweetener for all jellies and jams. You can also substitute it with honey.
- A squeeze strainer
This is not a mandatory item but it has always been on my wish list. I make ketchup at home and separating the usable liquid from the pulp is such a hard task.
A squeeze strainer is designed to make my work way easier. It is quite pricey at the moment but I definitely hope to own one in the future.
Can You Freeze Sour Cream? Click here to read.