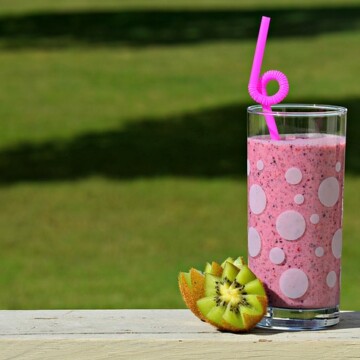
Juicing is a new trend in town. I am sure you have seen the #celeryjuicechallenge.
Juicing is a healthy way of ensuring that you get enough fruits and vegetables in your diet getting all the health benefits with just one drink. This is very beneficial especially if you do not like eating your fruit whole.
If you love juicing you will be excited to note that it is possible to juice without a juicer.
There are a couple of methods that will help you make juices using the supplies that you already have in your kitchen.
However, if you are not able to make the juice with your kitchen tools, check out my reviews on the best blenders for juicing, which will make your work way easier.
DIY Juicer Ideas

The first method is using a strainer.
You Will Need
- Fine mesh strainer
- Knife
- Chopping Board
- Water
- Spatula
- Bowl
- Chef’s Knife
- The fruits
Directions
STEP 1 – Preparation
Choose the fruits you would like to use. Wash the ingredients to remove the dust and the accumulated dirt.
You can peel the skin off so that it can be easier when you are pureeing the fruit, it all depends on the fruits that you have selected.
If you would prefer it to be seedless it all depends on what you choose but since you are not using a machine it would be easier if you remove the seeds. The same procedure is repeated for your vegetables.
STEP 2 – Blend
Chop your fruits or vegetables into very tiny pieces with a knife. Do so in a rocking motion. Then take your knife and place it almost flat but on a slight angle, edge side down.
Now with one hand on the handle and the other on the flat side of the knife, rock and drag the knife over the already-chopped food. Do this repeatedly until you wind up with a mush-like substance.
STEP 3 – Strain
Select a bowl that fits in with your strainer. Place the fine mesh strainer over the selected bowl. Pour the pureed fruit or vegetable on the strainer.
You can add some water to make the process easier. Use the spatula to extract the mixture from the pureed mixture. You can place a little bit of the mixture as you repeat the process.
The downside is that this process can be very time-consuming and you might not end up with a lot of the juice you would otherwise make with a blender or a juicer.
STEP 4 – Cleaning
This is the step that we usually dread. However, all the utensils you used as you made your juice need to be cleaned.
Scrap off the remaining pulp from the strainer and throw it in the bin because you have taken out almost all the nutrients from it. Then you can clean the rest of the utensils with the method you prefer.
Using a grater and strainer with cheesecloth

This is a clever technique used to make juice. This method is straining like the above method it is time consuming and you will be able to make a couple of glasses after repeating the process a couple of times.
You Will Need
- Grater
- Cheesecloth
- Bowl
- Fruits /vegetables
Directions
STEP 1 – Preparation
The first step as you handle food is to ensure that you wash it thoroughly and after that remove the seeds and stems because they are not essential during this process.
Everything varies with the fruits that you decide to use. For example apples and pears need to be peeled. For this purpose, we will use the example of carrot juice which is rich in beta carotene-an antioxidant needed for healthy eyes.
STEP 2 – Grate the fruits or vegetables
Take the grater and place it inside a wide bowl and start grating the produce. Begin by grating the ingredients into a bowl.
This method works well with solid fruits and vegetables; apples, carrots, pears, beetroots, cucumbers, gingers, and tomatoes. It will not work well with citrus fruits or leafy vegetables.
You need a fine grater to grate the carrots. Use around eight to ten juicy and fresh carrots so that you will be able to get one glass of juice. If you want more than one glass you will need to use more carrots.

STEP 3 – Squeeze the Pulp
Once you have finished grating the produce, take that product and place it inside the strainer with the cheesecloth.
Squeeze the pulp and strain the juice in the same bowl that you grated your produce into. Note that you should squeeze tightly so that you can get a lot of the juice in the pulp.
Twisting the cheesecloth may hasten the process for you. Once you grate the carrots, rub a bit of salt on the grated carrots.
Salt is ideally meant to release juices from the carrots and this will ensure that the carrots remain undisturbed for a few minutes as you prepare to strain them with the cheesecloth.
If you are making tomato juice you need to be careful because if you squeeze too tightly you will get chunks of pulp in your juice instead.
STEP 4-Clean Up
Clean your workstation and the utensils once you are done.
Mashing with a pitcher

This works well with citrus fruits but you can use it with other ingredients but I would recommend your top option for this method to be lemons or oranges.
You will get a smaller amount of juice using this method as opposed to the amount you might get with other methods.
You Will Need
- Pitcher
- Bowl
- Mashing tool such as a potato masher
Directions
STEP 1 – Prepare the ingredients
Clean produce is very important therefore wash your selection of fruits. As you are using citrus fruits there is no need to peel or chop fruits.
If you choose other fruits you will need to chop and peel the fruit. The seeds should not worry you because as you mash your produce, they will break open.
STEP 2 – Mash
Put the ingredients in the pitcher and use the mashing tool aggressively on the pitcher. Ensure that your pitcher is wider or opt to use a bowl.
Once you have finished mashing you will need another pitcher to pour out the juice you have been able to extract.
STEP 3 – Clean Up
Use cold water to wash the pitcher and a cleaning agent to remove the pulp remnants.
How to make apple juice

You will need
- Apples
- Pot
- Strainer
- Bowl
Directions
Step 1- Prepare the Apples
You have to wash the apples, peel, and core the apples.
Step 2- Boil the apples
Put the apples in a pot, cover them with enough water. Proceed to boil the apple and water mixture for approximately thirty minutes.
Step 3- Strain the mixture
You will have to let the mixture cool before you strain it. Mash the softened apples a bit to get the most juice.
Use a strainer to strain the mixture into a bowl. You can add a bit of sugar if it is not sweet enough. Keep the juice refrigerated.
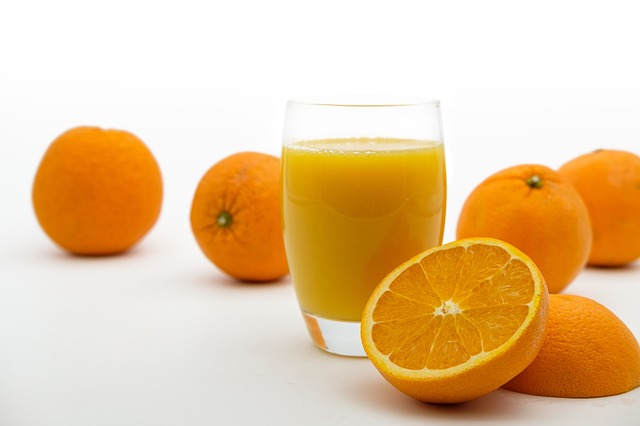
How to juice oranges by hand

To learn how to juice oranges without a juicer,
You will need
- Hand juicer
- Oranges
Direction
STEP 1- Cut the oranges
You will begin by cutting the oranges in half.
STEP 2- Get a hand juicer.
In order for you to juice oranges you will need a hand juicer. Place it on a flat surface and a bowl beneath it for the collection of the juice.
On the conical portion of the hand juicer, squeeze half of the oranges. As you squeeze you have to twist the oranges. Two or three oranges will give you one glass of orange juice.
Step 3: Clean Up
After you have finished enjoying your glass of juice. Ensure that you clean up your utensils.
How to juice a lemon

Lemon juice is a health win for you. It contains a lot of vitamin C and you can add hot water to it when you are coughing or have the flu.
You Will Need
- Lemons
- Microwave
- Sugar syrup
- Pitcher
Direction
Step 1: Place the lemons in the microwave
For you to get the most juice out of your lemon, you need to microwave it for a few seconds. This will help you release all the juice.
You can rub the lemon horizontally on a flat surface a couple of times this helps release the juices as well.
Step 2: Squeeze the lemon
Squeeze the lemon juice into the pitcher. The more lemons you use the more juice you will get. Then add in the sugar syrup to the taste you prefer.
There are various methods you can use to get your daily dose of juice if you do not have a juicer or blender.
Juicing is a healthy and fun way of getting all the nutrients you need to keep you healthy.
Investing in a juicer and a blender can be a plus for you but you will not be stranded if you do not have either.
The only downside with these methods is that you will need a lot of effort to produce small quantity of juice but it is amazing to have an alternative method to make your juice.